- After Effects Tutorial
How to Create a Mask from a Shape with After Effects
Feb 13,2020• Proven solutions
Creating and using masks is a fundamental aspect of getting the best from After Effects, here we will look at the process for creating masks from the shape menu, which is the most straightforward way to implement a mask.
This is a basic tutorial about the professional video editing software After Effects. However, if you still think it is difficult to use, consider Wondershare FilmoraPro, which is a professional video editor for intermediate users who want to enter a higher video editing level.
You can mask video with it to unleash your creativity. It supports rectangle, ellipse and freehand masking mode. Download it now to have a try.
In the following part, we will show you how to mask in After Effects.
1. Setup and create a new composition
To get started we first create a new composition, I created a small 320x240 resolution composition for this purpose, and added a text layer that simply contains a single word ‘mask’ in yellow.
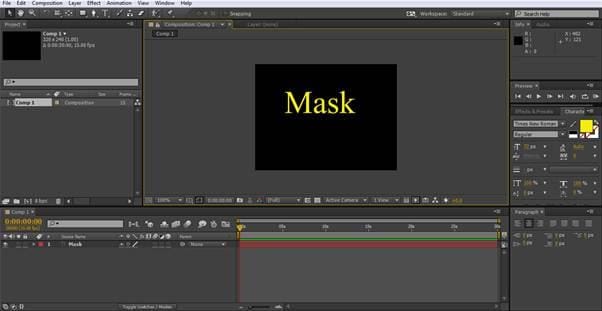
This is purely to illustrate the technique, you can use a mask on any type of layer you wish in your projects, as we will discuss later on.
2. Select Shape tool
It is important to understand how the shape tool works for effective masking, the tool is dual purpose and as such it is important to follow the correct steps to get the effect you want.
First off, the tool itself is on the top menu, or shortcut ‘Q’, the drop down menu allows you to choose from a variety of shapes as we can see here.
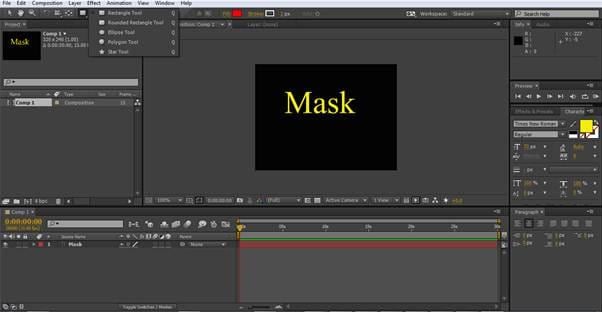
You can also cycle through the shapes by using the Q shortcut.
Using the shape tool will create a mask ONLY if the layer you wish to mask is selected in the timeline, if nothing is selected, the tool will create a shape layer. There are many instances you will want to do this, but for this project we are looking at masking specifically, and so we ensure our text layer ‘Mask’ is highlighted, select the rectangle shape tool, and draw a mask around the text, which results in what we see in this screenshot.
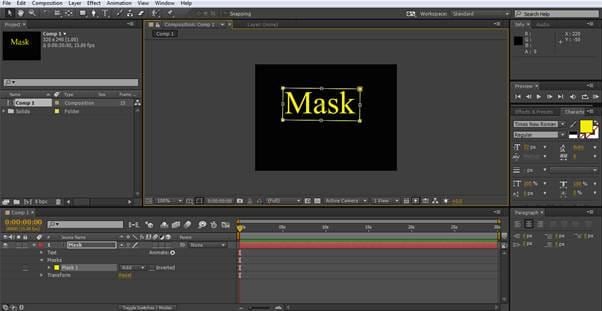
It is important to note that unless the ‘inverted’ box is ticked next to the mask component of the timeline, the mask hides everything but what is contained within the mask itself. Inverted works in reverse, everything is visible but what is inside the mask.
Here is what happens if we drag the mask off the text to illustrate how this works.
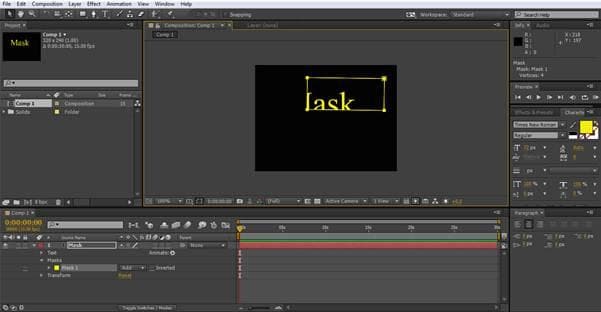
The text is still there, it hasn’t moved at all, the mask just hides parts of it as it moves around. This is the foundation of creativity within After Effects, but we now have our text and our mask, what can we actually do with it?
3. Adding Movement and Animation
As with most things in After Effects, creating movement using masks is based around the keyframe function. We set our keyframes in the timeline, and After Effects animates the points in between for us. This allows us to create some interesting effects with just a simple rectangular mask and a single word of text.
We start off with our first keyframe. Within the text layer on the timeline we selects the Mask and then click the stopwatch next to Mask Path to create our first keyframe at the start of this clip.
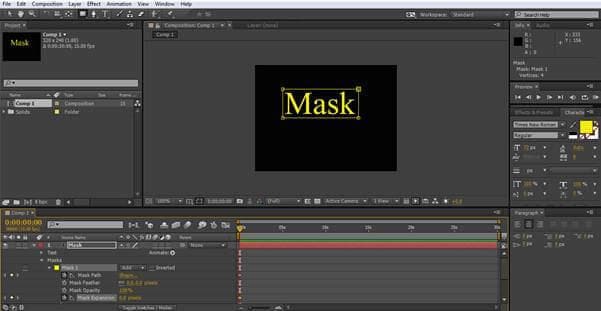
Now we have our start position we can create our movement by advancing the time cursor and then adjusting the mask for the next keyframe. As the below shot shows, the controls for the mask extend beyond simply moving it, you can adjust the opacity, feather the mask to blend it, even change its shape as part of the movement.
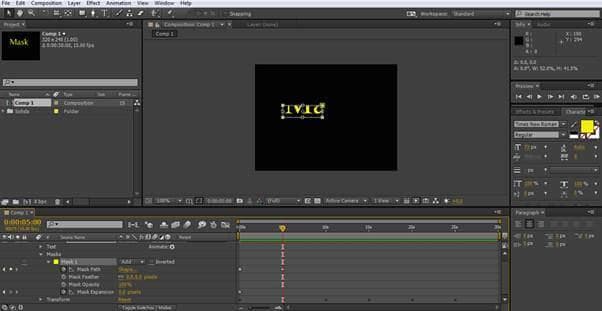
In this case though, I have simply advanced the timeline 5 seconds and shrunk the mask to one corner, and created the second keyframe.
The next keyframe is created in the same manner, here I have advanced the time cursor and moved the mask upwards to the right of the text.
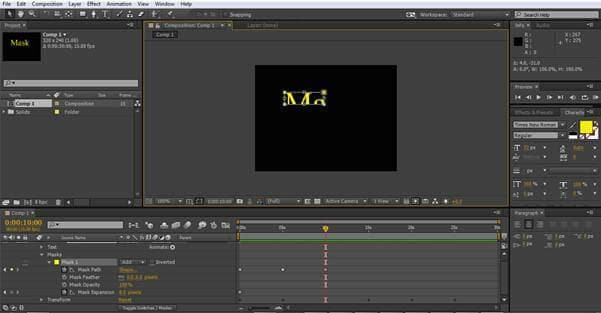
So what we have so far is the mask starting off revealing the whole word, then shrinking into one corner, then moving up to the top left, I will now create two more keyframes to move it across to the top right of the text, and final the bottom right.
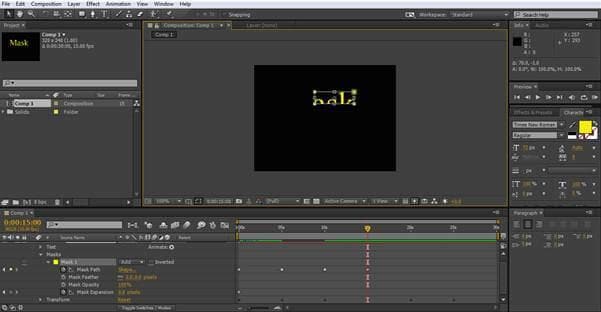
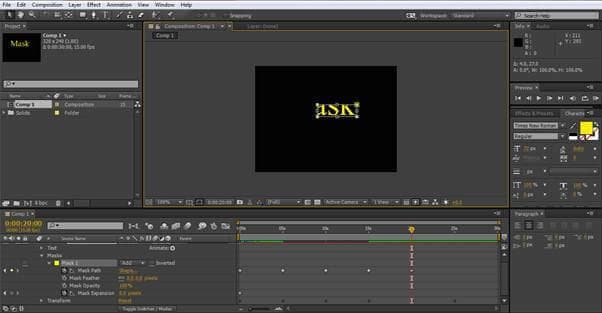
Now we have a sequence where we start with the whole word ‘mask’, which then disappears as the mask shrinks down, then parts of the word are revealed as the mask travels around the text.
The final part is simply to expand the mask to the left to reveal the whole word again.
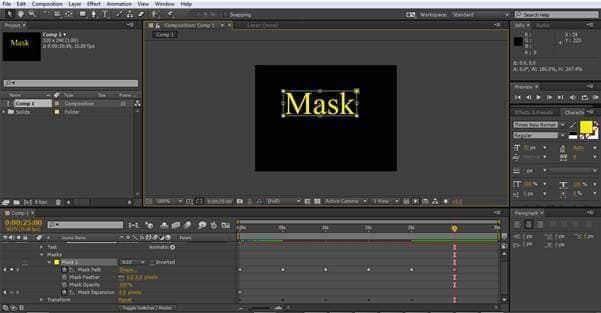
This is the final keyframe for this movement and completes our little animation.
Whilst obviously, such a simple sequence is not going to win any awards, it does illustrate the basic steps of manipulating masks created from the shape tool and I am sure you can begin to see the possibilities, add in movement in the layer under the mask and you can produce some amazing effects very quickly indeed. However, as we have seen, there are further options to adjust the mask effects so now it is time to look at these in a little detail as well.
4. Creating Multiple Masks
You can have more than one mask on a layer, and you can vary how they interact to create numerous effects, to illustrate this I created a new composition, and added two solid layers using Layer>New>Solid, the first layer is bright red, and the second layer blue. Then using the shape tool with the blue layer selected, I created 3 separate rectangular masks as we can see here.
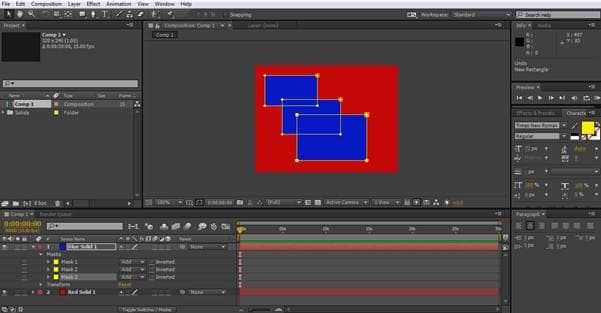
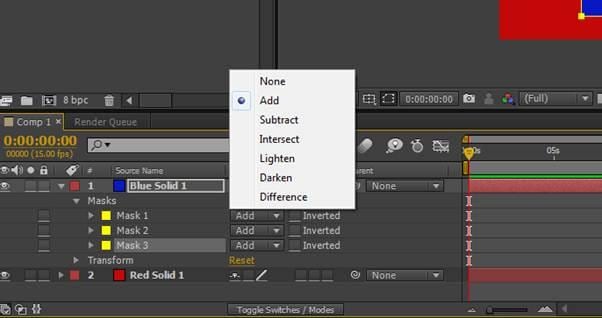
This shows all three masks in the default form, I have overlapped them to illustrate how you can change the various mask modes for different effects. The default is ‘Add’, as can be seen to the left of each mask in the timeline panel. We can change this to seven different modes, as we can see here.
Changing mask 2, the middle one, to ‘Subtract’ reveals this result
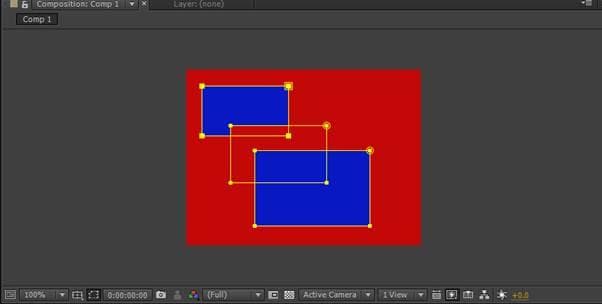
As we can see, it negates the mask that is underneath it, but has no effect on the one that is above it.
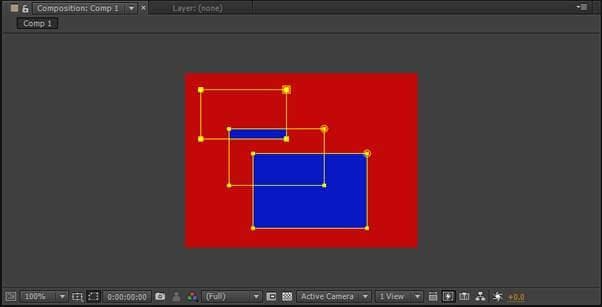
Changing to Intersect inverts the mask it overlaps apart from the area of intersection, and finally
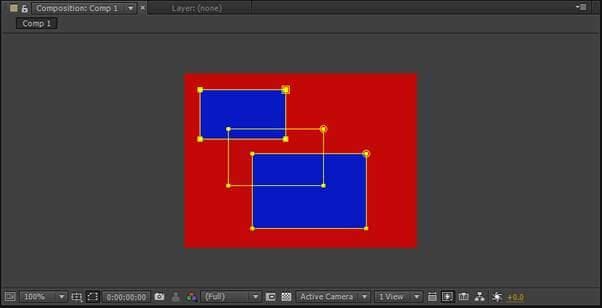
Setting it as none essentially disables the mask.
These 4 are the main modes that will be used in mask work, the others can have their uses, experimenting with them is the best way to understand their effects in various situations.
Conclusion
Masking forms the basic building block of many techniques that are used in After Effects to create spectacular effects, and understanding the workflow and possibilities at the base level is an important step in using the full extent of After Effects, although our simple movement is quite a basic clip, it features the fundamentals of movement and mask adjustment that all aspects of masking require. Whilst many try and jump in at the deep end with all the advanced techniques, it is important to have a good understanding of the underlying processes and how they interact to be successful in the long term.
Bring up your video to a professional level with straightforward tools.
Try It Free Try It Free


Benjamin Arango
staff Editor
0 Comment(s)